From Pool Pump to Pergola: Bringing the Wood Ceiling Back to Life
One home project has a funny way of inviting five more to the party.
That is exactly what happened after we moved into our new home in July 2025. The house came with a pool, which was exciting, but it also made us first-time pool owners overnight. I knew there would be a learning curve. Chemicals, skimming, filters, timers, plumbing, random noises from equipment I did not yet understand. All of it was new.
The first big project on my mind was simple enough: replace the older single-speed pool pump with a variable-speed pump. The existing pump worked, but it was older, loud, and not exactly energy friendly. I figured that would be a good first upgrade and pay off over a relatively short time period.
Then I looked closer at the pool equipment area and got a better look at the electrical setup.
The sub-panel and connections looked like they were about 50 years old. Corroded. Weathered. Visually, a rat’s nest. The kind of thing that makes you stop thinking about the pump for a minute and start thinking about the whole system feeding it.
And since that electrical box would need attention anyway, my brain immediately jumped to the pergola nearby.
The pergola had no electric. No outlet. No lighting. No ceiling fan. Just a nice covered outdoor space that was not living up to its potential. If I was already going to deal with the pool electrical area, it made sense to think ahead and run power to the pergola at the same time.
But of course, before adding a ceiling fan, I had to look up.
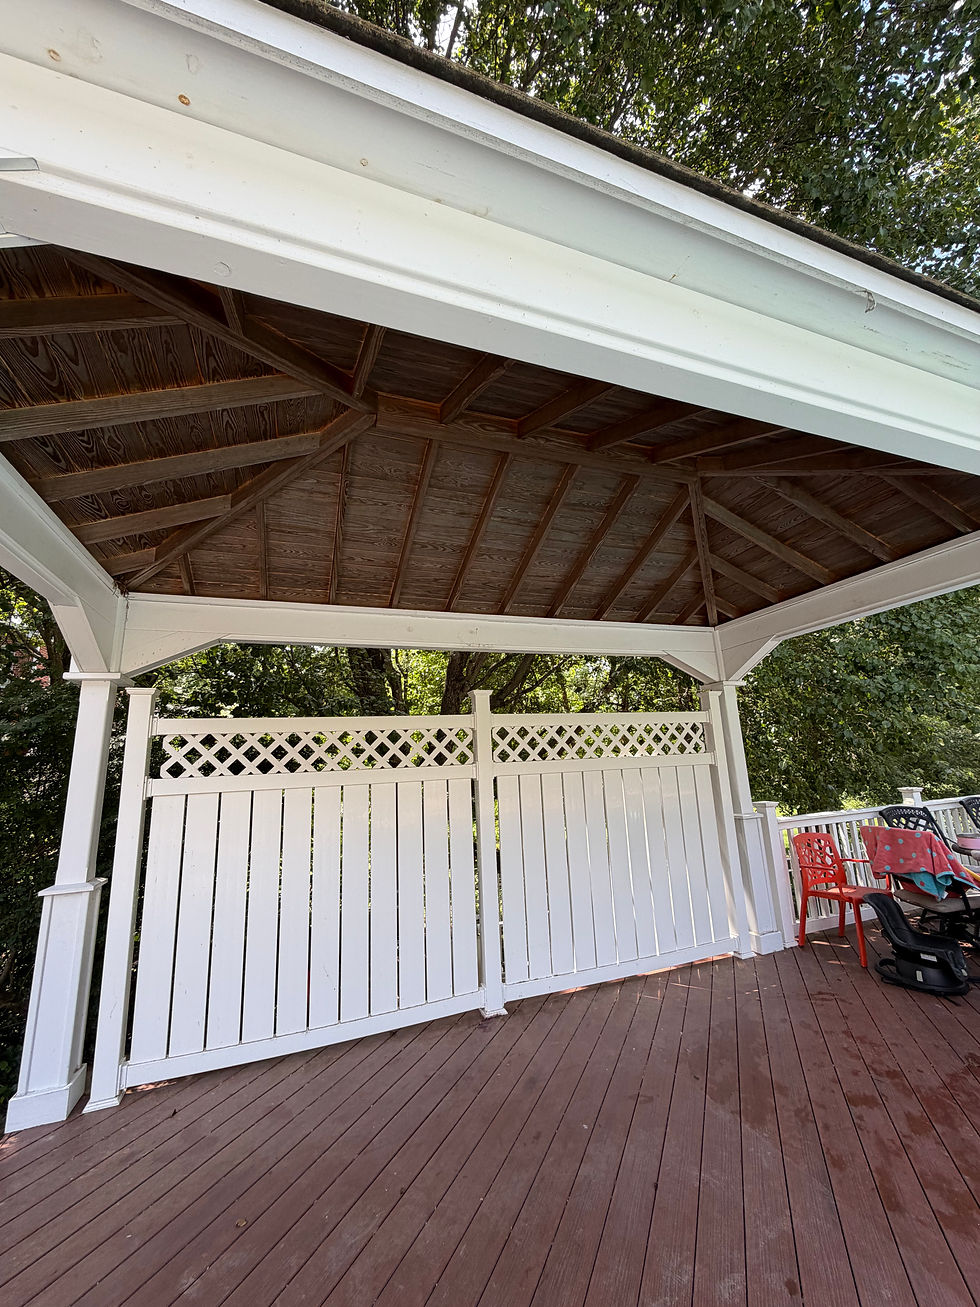
The pergola’s wood ceiling was tired. Dirty. Faded. Dried out from years of weather and exposure. There was no way I wanted to install a new outdoor fan against a ceiling that looked neglected.
So the pool pump project became an electrical project, which became a pergola power project, which became a wood cleaning and staining project.
That is how we got here.
This post is about the part of the chain I could tackle first: bringing the pergola’s wood ceiling back to life.
The pergola had good bones, but it needed attention
The wood ceiling had that dull, gray, weathered look. Some areas were darker from dirt and moisture. Other spots looked dry and washed out. From a distance, it blended into the background. Up close, it looked like it had not been cleaned or protected in a long time.
That matters more than I expected.
An overhead wood ceiling sets the tone for an outdoor space. When it looks fresh, the whole pergola feels intentional. When it looks tired, even nice furniture and landscaping can only do so much.
I started with a real cleaning, not just a quick rinse
It is tempting to jump straight to stain because that is the satisfying part. Stain is where the color comes back and the project starts looking finished.
But stain only looks as good as the surface underneath it.
The ceiling needed a proper cleaning first. Since this was overhead work, I wanted to keep the process controlled. Blasting it aggressively with pressure felt risky because too much pressure can raise the grain, scar soft wood, or force water into places it does not need to go.
I treated the cleaning step as its own project. The basic plan was:
Remove surface debris.
Wash/brighten the wood with an appropriate cleaner.
Rinse thoroughly.
Let the wood dry completely before staining.
That last part mattered most. Wood can look dry on the surface while still holding moisture. Staining too soon can lead to uneven color, poor absorption, or a finish that does not last as long.
For overhead cleaning, I also learned quickly that gravity is not your friend. Dirty water, cleaner, and rinse water all want to come back down on you.
After a quick google search, the safest, quickest and easiest way to brighten the wood was to use a diluted mixture of an oxygen bleach. I ended up using OxiClean White Revive Laundry Whitener and Stain Remover Powder https://amzn.to/4z6mLHg in a 1-gallon sprayer https://amzn.to/4x7QY7i. I simply took 1 scoop of OxiClean per 1 gallon of warm water, pre-wet the surface with a hose first, then applied the OxiClean mixture generously I then let it sit on the wood for 15 to 30 minutes, making sure to keep it wet by adding more solution if it starts to dry out. I did use a power washer to gently wash off the solution, however, scrubbing the ceiling with a deck brush and using a hose to wash off the solution would have also worked well.
The ceiling looked better immediately after washing, but the real test came after it dried. That is when I could see what still looked dull, what had cleaned up nicely, and whether any areas needed a second pass.
By the time the cleaning was done, the pergola already felt better. The gray film was gone. The grain was more visible. The ceiling still needed color and protection, but it no longer looked forgotten.

Choosing the stain was about appearance and protection
Outdoor wood stain needs to do more than add color. It also needs to help protect the wood for longevity. For exterior wood, I prefer a finish that soaks in rather than one that sits on top like a thick film, especially in a covered outdoor area where peeling would be annoying to deal with later.
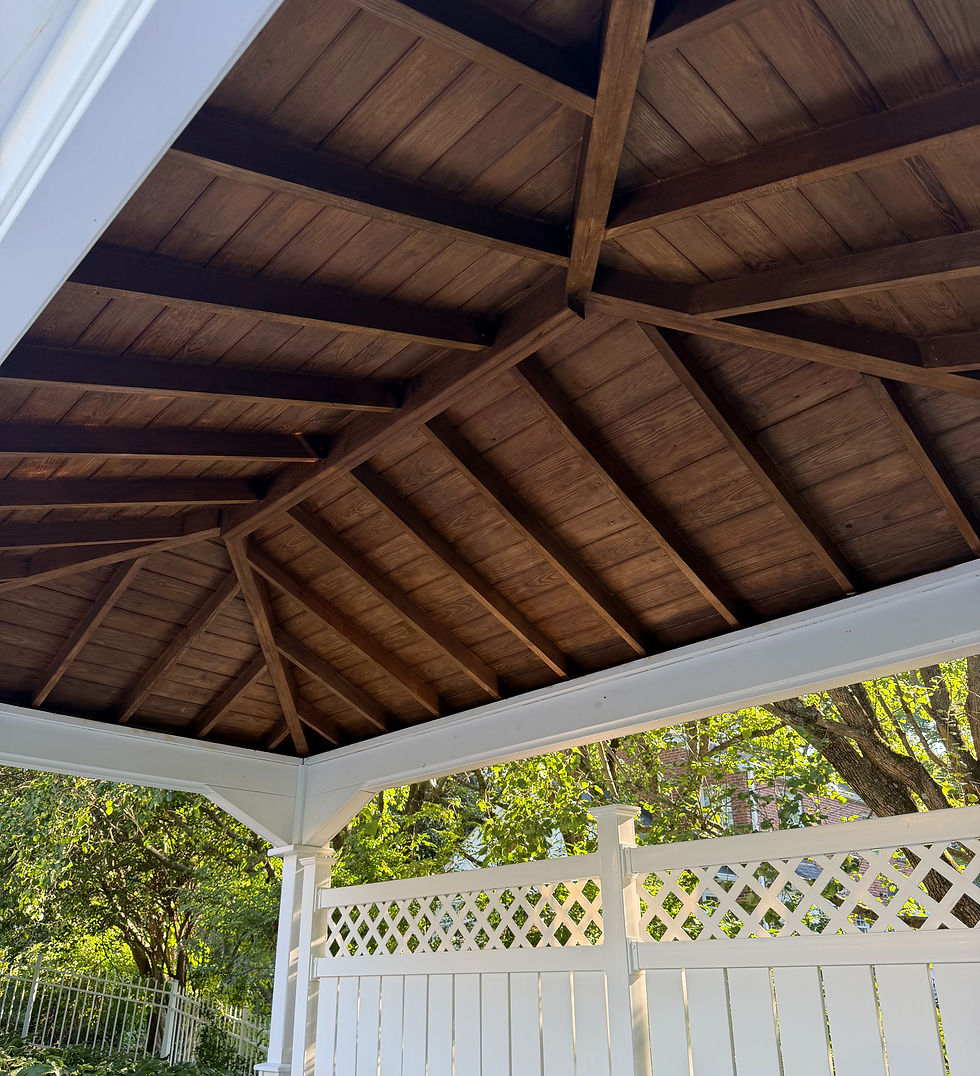
A while back, my brother-in-law recommended the stain he uses for all of his outdoor wood projects, of which I've gotten to observe over the years at their lake house. It's expensive, but it's really high quality: https://amzn.to/3S9HwRH. After I bought my first house and began my DIY journey (My DIY Beginnings), staining the new deck was one of my first projects. I naively bought a cheap stain without doing any research and absolutely paid the price later on as it did not hold up. So, I wasn't going to make the same mistake here. I chose dark oak in a transparent matte finish, but there are several other options.
Applying stain to a ceiling takes planning
Staining overhead is a different experience than staining a deck, fence, or tabletop. Every drip has a destination, and that destination is usually your arm, your face, or the floor below. Make sure you have an empty workspace with some sort of protection. I may or may not have ruined several pool floats, swim shirts, etc. in the process!
A quality brush for edges, seams, and detail work https://amzn.to/4fX6mO4
An applicator pad or similar tool for larger flat runs https://amzn.to/4wWjKb0
Drop cloths under the work area - invest in a canvas cloth over the disposable plastic ones. They are so much easier to handle and will last a long time! https://amzn.to/45pCmEg
Gloves https://amzn.to/4wWATS9
Rags for quick cleanup
I applied the stain in sections, following the direction of the boards. Working with the grain helped the finish look more natural and made it easier to avoid lap marks.
The biggest lesson was to avoid overloading the brush or applicator. More stain did not mean better coverage. It just meant more drips. Thin, controlled application worked much better.
I also kept a rag nearby the entire time. If stain pooled in a seam or collected along an edge, I could catch it before it dried into a dark spot.
The transformation happened fast once the stain went on
After all the cleaning and waiting, the staining step felt like the reward.
The first section changed immediately. The dull, dry ceiling started showing depth again. The color evened out. The grain became more noticeable. The entire pergola began to feel less like an old structure near the pool and more like an outdoor room.
That was the moment the project felt worth it!
The ceiling fan project will make a lot more sense now
This entire project started because I was thinking ahead to electricity in the pergola.
A ceiling fan will be a huge improvement out there. Around a pool, any extra airflow is welcome, especially during hot summer days. But I am glad I did the ceiling first.
Be on the lookout for the next post in this series of pool improvements!


Comments